

Overview
Gemini CLI is Google’s open-source command-line AI tool that lets you interact with Gemini models directly from the terminal for code understanding, generation, and editing. By connecting Gemini CLI to AihubMax, you can use AihubMax’s Gemini model offerings.Prerequisites
AihubMax API Key
An active AihubMax API key with access to Gemini models. Go to AihubMax →
Node.js 20+
Node.js v20 or later and npm are required for installing Gemini CLI. Download Node.js →
Installation & Configuration
1
Step 1: Install Gemini CLI
2
Step 2: Set Your API Key
Before configuring environment variables, go to the AihubMax Console to create a dedicated key: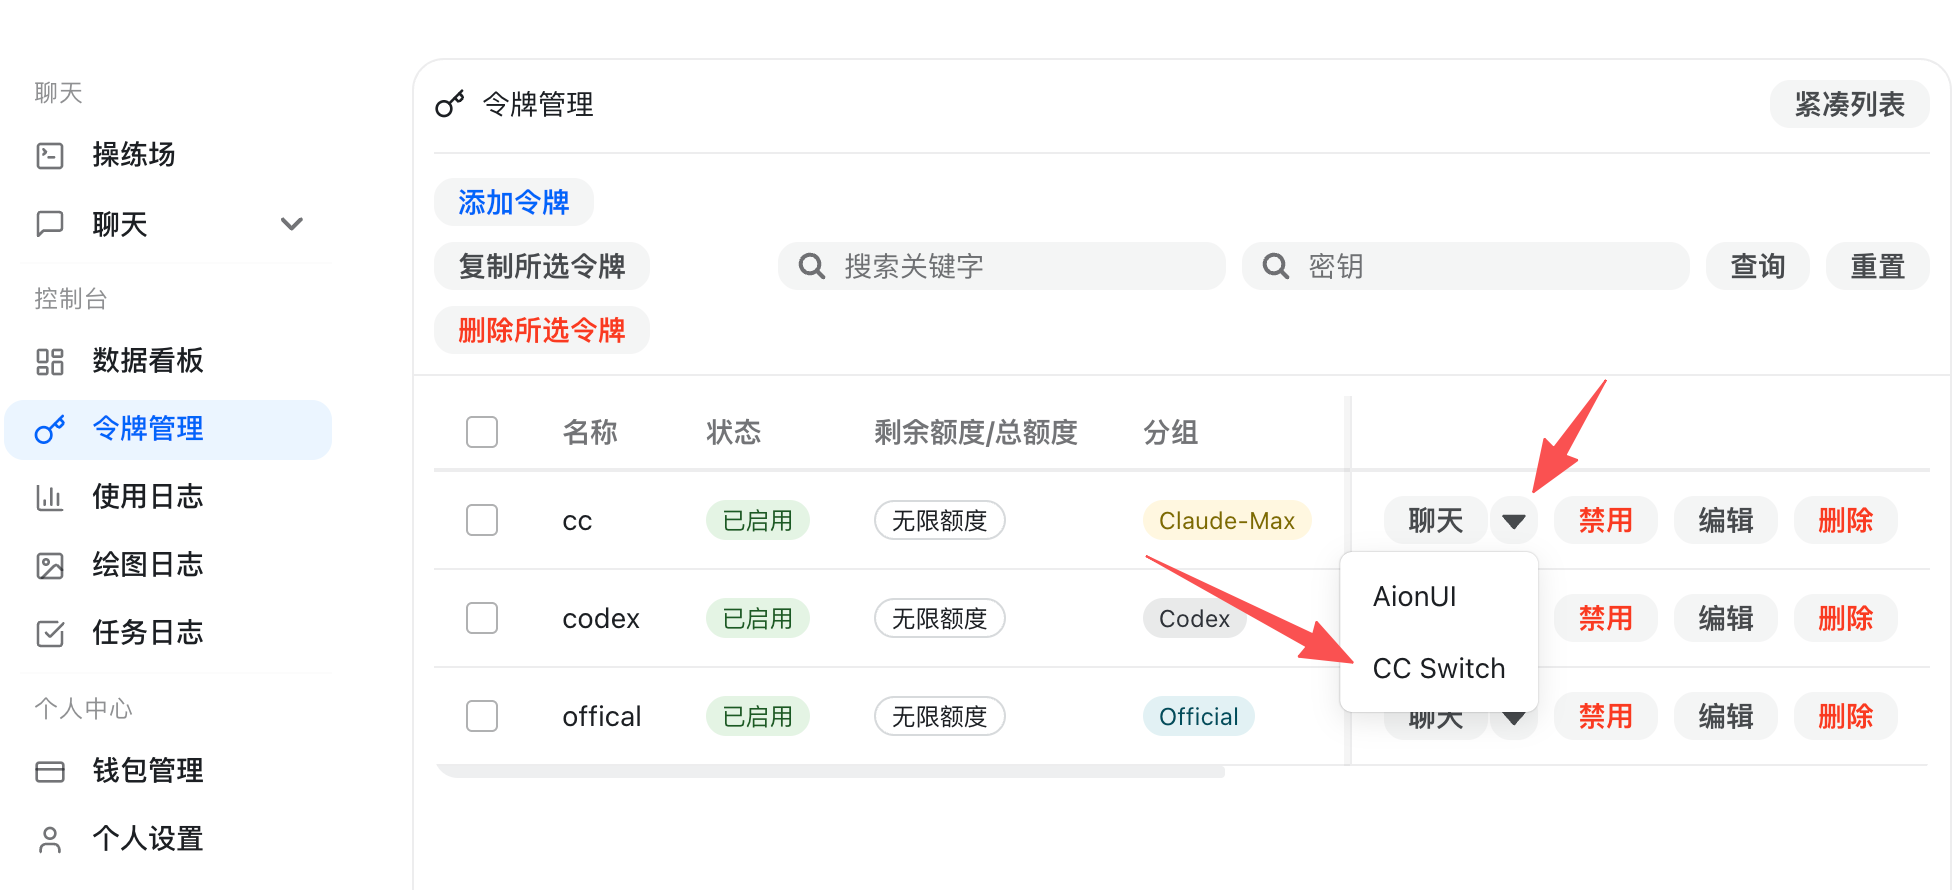 After launching a terminal through CC-Switch, the tool will automatically inject
- Open the “API Keys” page and click “Create Key”.
- Name the key “Gemini CLI” or another easily identifiable name.
- Make sure to select the “Gemini_CLI” group — this group enables the additional transcoding and rate limits required by the Gemini protocol.
GEMINI_API_KEY environment variable. Choose either method below: use CC-Switch for automatic injection, or manually export the variable in your shell profile.- CC-Switch (Recommended)
- macOS / Linux
- Windows PowerShell
- Download and install the package matching your system from GitHub Releases.
- In CC-Switch, add a new “Gemini CLI” configuration. Keep the default Base URL as
https://api.aihubmax.com, and select “Custom Header” for the authentication method. - Go back to the AihubMax key list, click “Import to CCS” next to your target key, and select the configuration you just created.
After launching a terminal through CC-Switch, the tool will automatically inject GEMINI_API_KEY into the current shell — no manual export needed.3
Step 3: Modify the Base URL
Gemini CLI does not support custom base URLs through configuration. You need to modify two source files inside the installed package.First, find your npm global installation directory:If you’ve cloned this docs repository, you can also run the bundled helper script to patch both files automatically:The script resolves the global install directory, patches both
index.mjs and index.cjs, and creates .foxapi.bak backups of the original files.Then modify the following two files:File 1: {install_dir}/@google/gemini-cli/node_modules/@google/genai/dist/node/index.mjs (around line ~11222)File 2: {install_dir}/@google/gemini-cli/node_modules/@google/genai/dist/node/index.cjs (around line ~11244)In both files, find and replace:4
Step 4: Start Using Gemini CLI
Launch Gemini CLI in your project directory:Or run a one-off command:To switch models in interactive mode, type
/model.Verify the Connection
Run a test command to confirm everything is working:Available Models
Troubleshooting
Authentication error
Authentication error
- Verify your
GEMINI_API_KEYenvironment variable is set correctly, with a value that is your AihubMax API Key (starts withsk-). - Ensure the key has not expired and has sufficient balance.
- Verify the key has access to Gemini models.
Connection timeout or errors
Connection timeout or errors
- Verify the base URL modification was applied correctly in both files (
index.mjsandindex.cjs). - Check your network connection to
api.aihubmax.com. - Try using a VPN if your region has connectivity issues.
Changes lost after update
Changes lost after update
- After running
npm update -g @google/gemini-cli, the source files are overwritten. - Re-apply the base URL modification following Step 3 above.
Model not available
Model not available
- Confirm the model name matches the AihubMax model list.
- Use
/modelin interactive mode to switch between available models.